
Behind the Scenes: Crafting a Photoreal Drone Visualization from Scratch
When you look at a finished 3D product visualization, it’s easy to forget how many hours of modeling, tweaking, and experimenting go into it. In this behind-the-scenes look, we’re pulling back the curtain on one of our recent projects—a fully modeled and rendered drone scene—so you can see exactly how the magic happens.
We didn’t just drop a model into a rendering engine and call it a day. Every element in the final image—from the drone itself to the shimmering water below—was created by our studio in Cinema 4D, then brought to life with careful lighting, rendering, and post-production work.
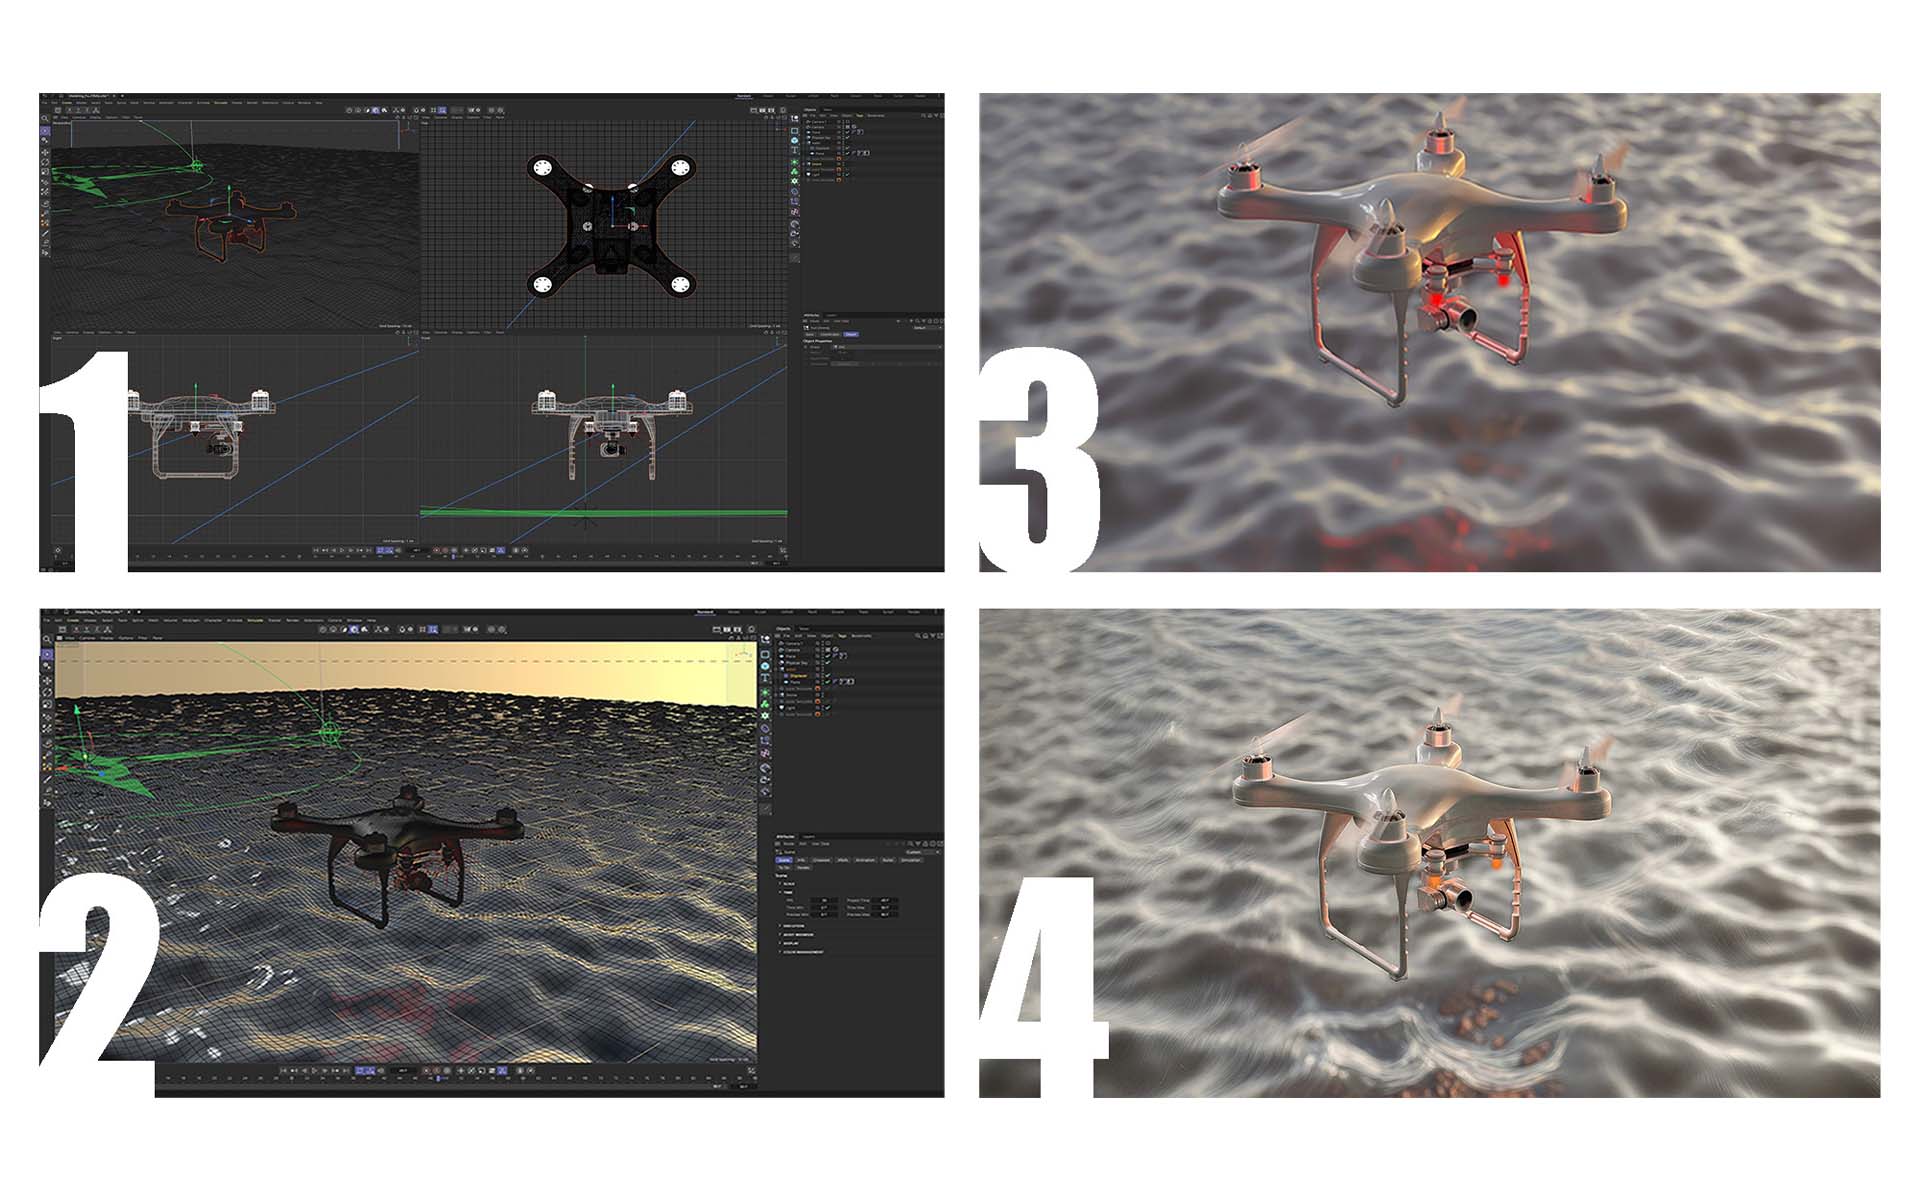
Stage 1 – Building the Model
It all starts with the basics: geometry. Using Cinema 4D, we constructed the drone model piece by piece—frame, propellers, camera, and all the tiny components that make the design believable. At this point, there’s no color, no texture, no lighting—just clean shapes and accurate proportions. Think of it as the skeleton that everything else will be built on.
(Image 1: Cinema 4D workspace with the raw drone model)
Stage 2 – Adding Textures, Lighting & Camera Setup
This is when things start to get exciting. We applied high-quality textures to every surface—matte finishes for the body, reflective glass for the camera lens, subtle metallic accents for the propeller hubs. Then we positioned the camera at the right angle to capture the drone’s best side and set up a lighting environment to give depth and realism to the scene.
(Image 2: Drone with materials, lighting, and camera in Cinema 4D)
Stage 3 – Rendering the Scene
Once the materials, lights, and camera are locked in, it’s time to hit the render button. This is where Cinema 4D crunches all the data to produce a realistic image. We also simulated the water in this stage—yes, the ripples and reflections you see are all 3D, not a stock photo. It’s a slow process, but watching the render come together is always satisfying.
(Image 3: Finished render of the drone in Cinema 4D)
Stage 4 – Post-Production in Photoshop
Even a great render benefits from a little polish. In Photoshop, we fine-tuned the colors, adjusted contrast, sharpened details, and added subtle visual effects to make the image pop. This is the final touch that takes the visualization from “nice” to “wow.”
(Image 4: Final post-produced drone visualization)
Why This Matters
For us, product visualization is about more than making something look pretty—it’s about telling a story and creating a visual that feels real enough to touch. From initial modeling to the last pixel adjustment, every step is handled in-house to ensure the result is as unique as the product itself.
Want to see more? Keep an eye on our blog for upcoming behind-the-scenes breakdowns of our interior design and photography projects.
Related Articles

toma
Studio
