
From Concept to Construction: How We Shape Interiors
When most people think about interior design, they picture stylish furniture, cozy lighting, and beautiful finishes. But what actually happens between the first idea and the final, livable space? At our studio, every project follows a clear process that helps transform inspiration into a buildable, detailed design.
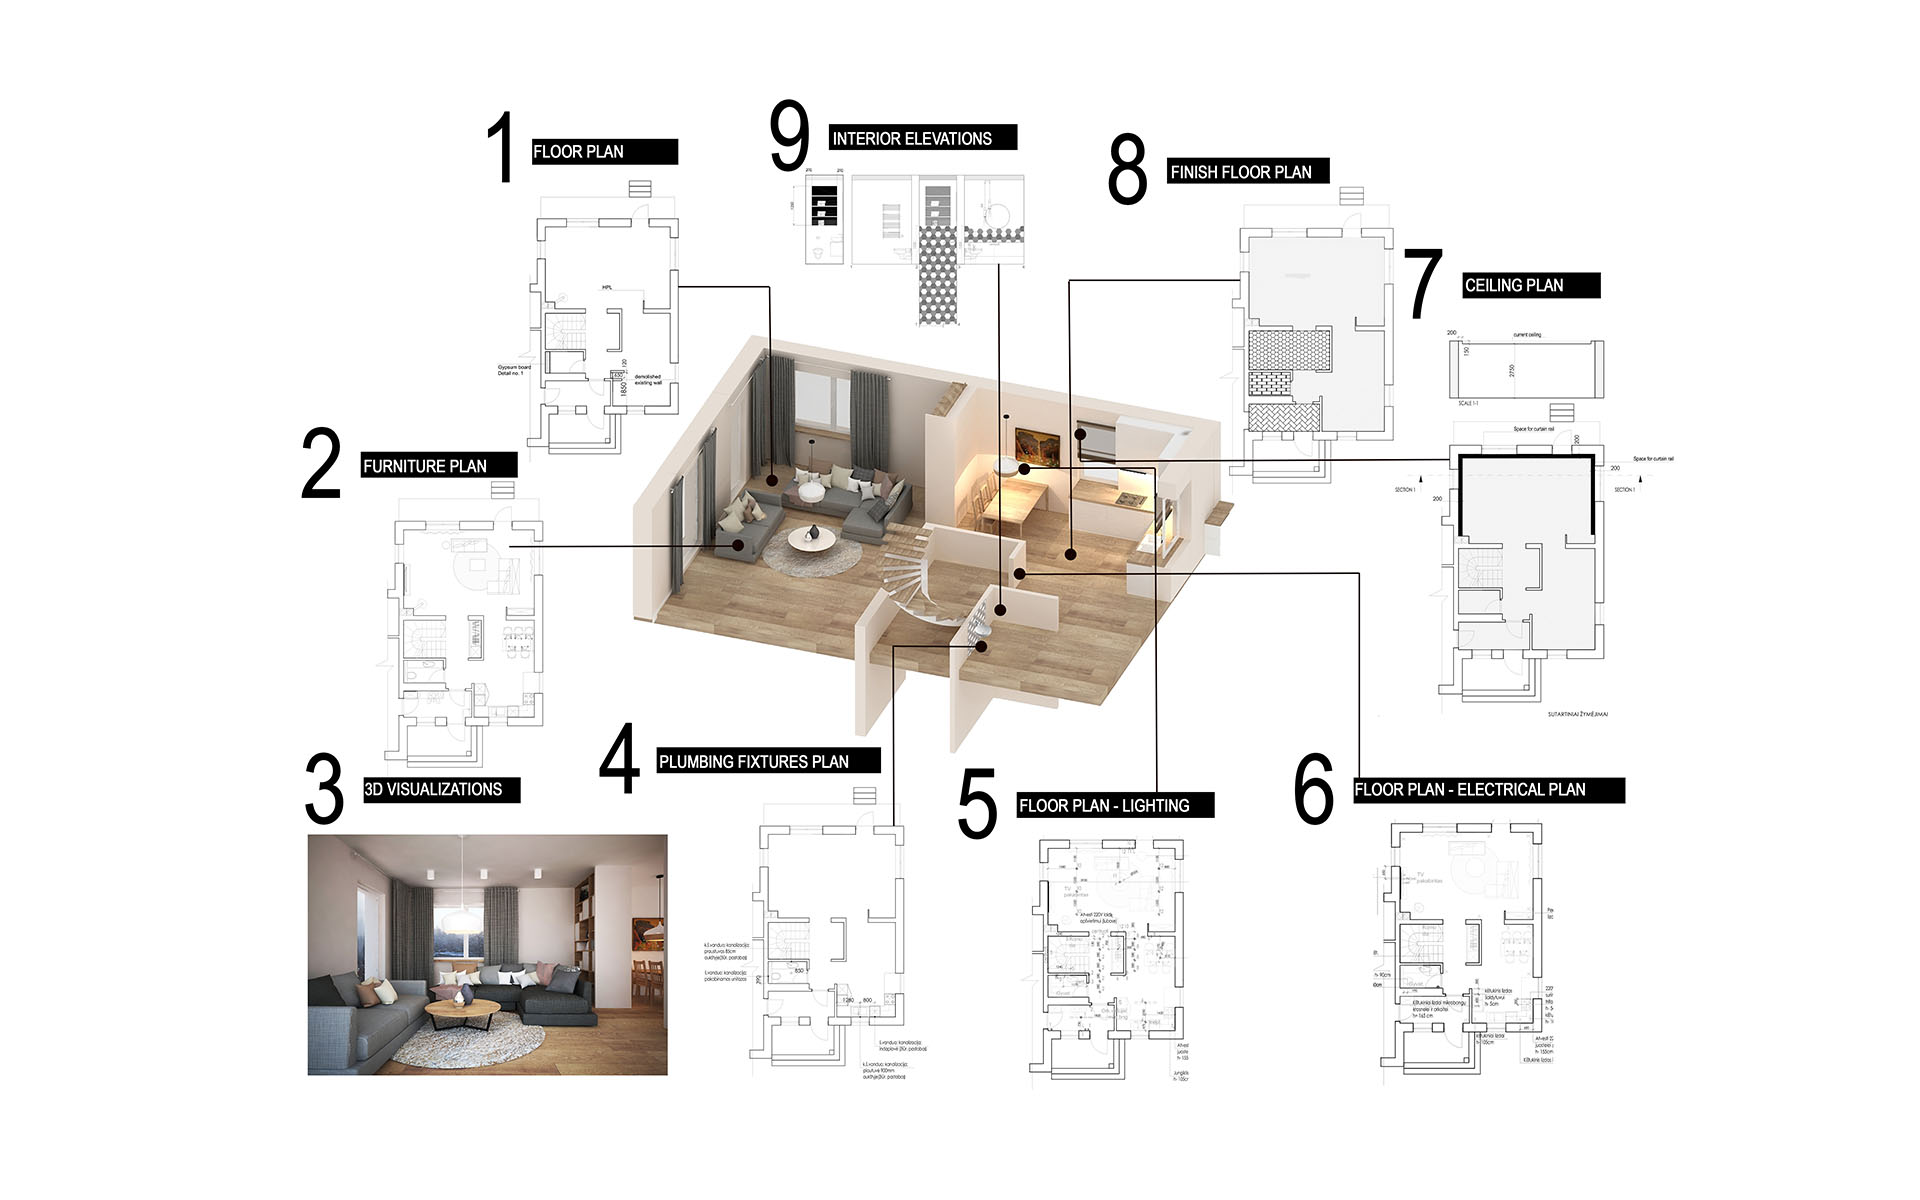
The image above shows the main steps and drawings that form the backbone of a project. Let’s walk through how it works.
1. Moodboards & Inspiration
Every project begins with moodboards. This is where we collect references, images, and material samples to capture the atmosphere and style a client is looking for. Whether it’s minimal, rustic, or futuristic, moodboards set the direction for everything that follows.
2. Visualizations
Once we have a clear mood, we often move into 3D visualizations. These photorealistic renders show how materials, lighting, and furniture will look together. It’s a powerful step because it turns ideas into something tangible — a preview of the final space.
3. Floor Plan Layout
Another key step is preparing the floor plan layout, showing new or adjusted walls, room organization, and circulation. This gives structure to the design and ensures the interior functions as well as it looks.
4. Furniture Plan
With the layout defined, the furniture plan is created — covering built-in closets, kitchen layouts, bathroom arrangements, and all loose furniture. This stage is where daily functionality really gets locked in.
Flexibility in Order
While stages 2, 3, and 4 are listed here in sequence, they don’t have to happen in this exact order. Some projects start with renders if the client already has a clear moodboard or layout in mind. Others begin with floor plans before moving into visuals. We adapt the process to match the situation and the client’s needs.
5. Technical Drawings & Details
Once the design direction is clear, we move into detailed technical drawings:
- Plumbing Fixtures Plan – precise bathroom layouts with fixture dimensions.
- Lighting Plan – placement of lamps, recessed lights, and switches.
- Electrical Plan – location of sockets, wiring, and systems.
- Ceiling Plan – ceiling heights and details if required.
- Finish Floor Plan – exact types of flooring for each room.
- Interior Elevations – scaled views of kitchens, built-ins, and millwork.
For our Swiss projects, these are often referred to as Sanitärplan, Elektroplan, or Bodenbelagsplan — but in this article we’ll stick with English terms for clarity.
These drawings give contractors all the technical information they need to build exactly what was designed.
6. Final Material & Furniture Selection
The last step is often the most exciting: choosing final finishes and furniture from manufacturers. Flooring samples, fabrics, and lighting selections are confirmed, step by step turning the vision into a complete interior.
Interior design isn’t just about picking a sofa or wall color. It’s a structured, adaptable process that blends creativity with precision. By moving through moodboards, visualizations, plans, and technical drawings — in whatever order suits the project best — we ensure the final space looks beautiful, functions well, and feels like home
Related Articles


toma
Studio
